
Nine steps — indoors, on a bench, before you install anything outside. Weatherproof installation lives in the setup guide.
Before you start, you’ll need
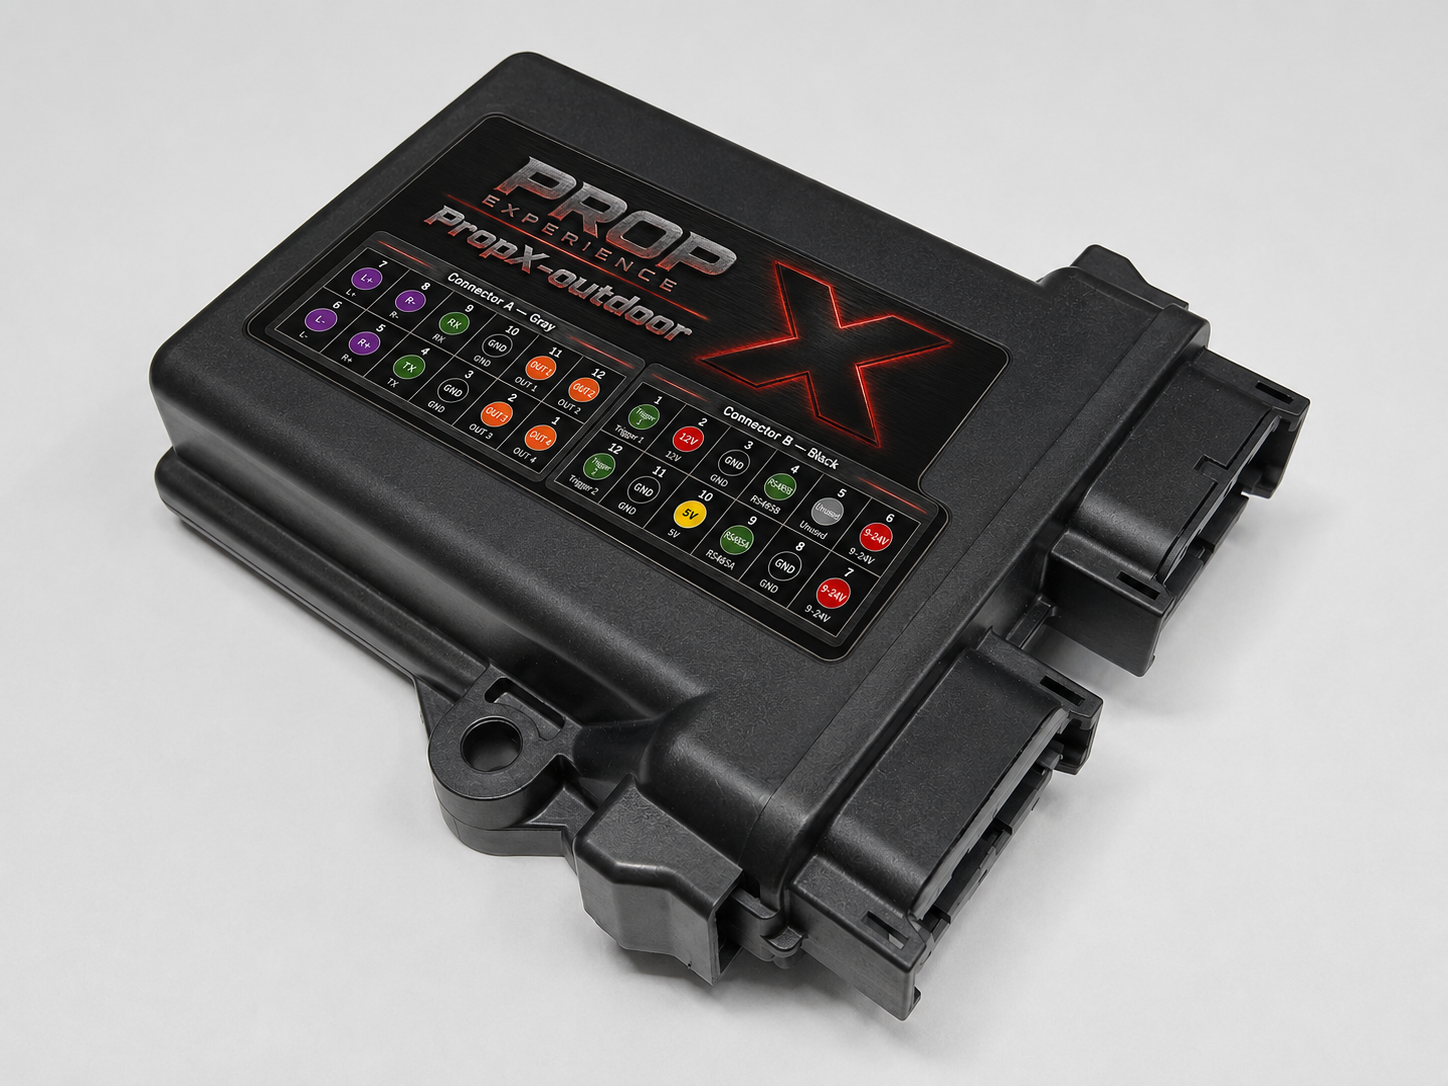
- Your PropX-Outdoor controller
- A 9–24 V DC power supply
- A prop or light drawing under 1.5 amps
- A small flat screwdriver or similar tool, to open the case
- A USB-C cable
- A computer with Bluetooth and the PropX Control Center app
- Time: about 10 minutes
⚠️ Warning: Never use a power supply above 24 volts.
The nine steps
Install the PropX Control Center app.
You'll see: the app's main window.
Open the case: push a screwdriver or a flat, narrow tool into the slot and pry outward to release the cover.
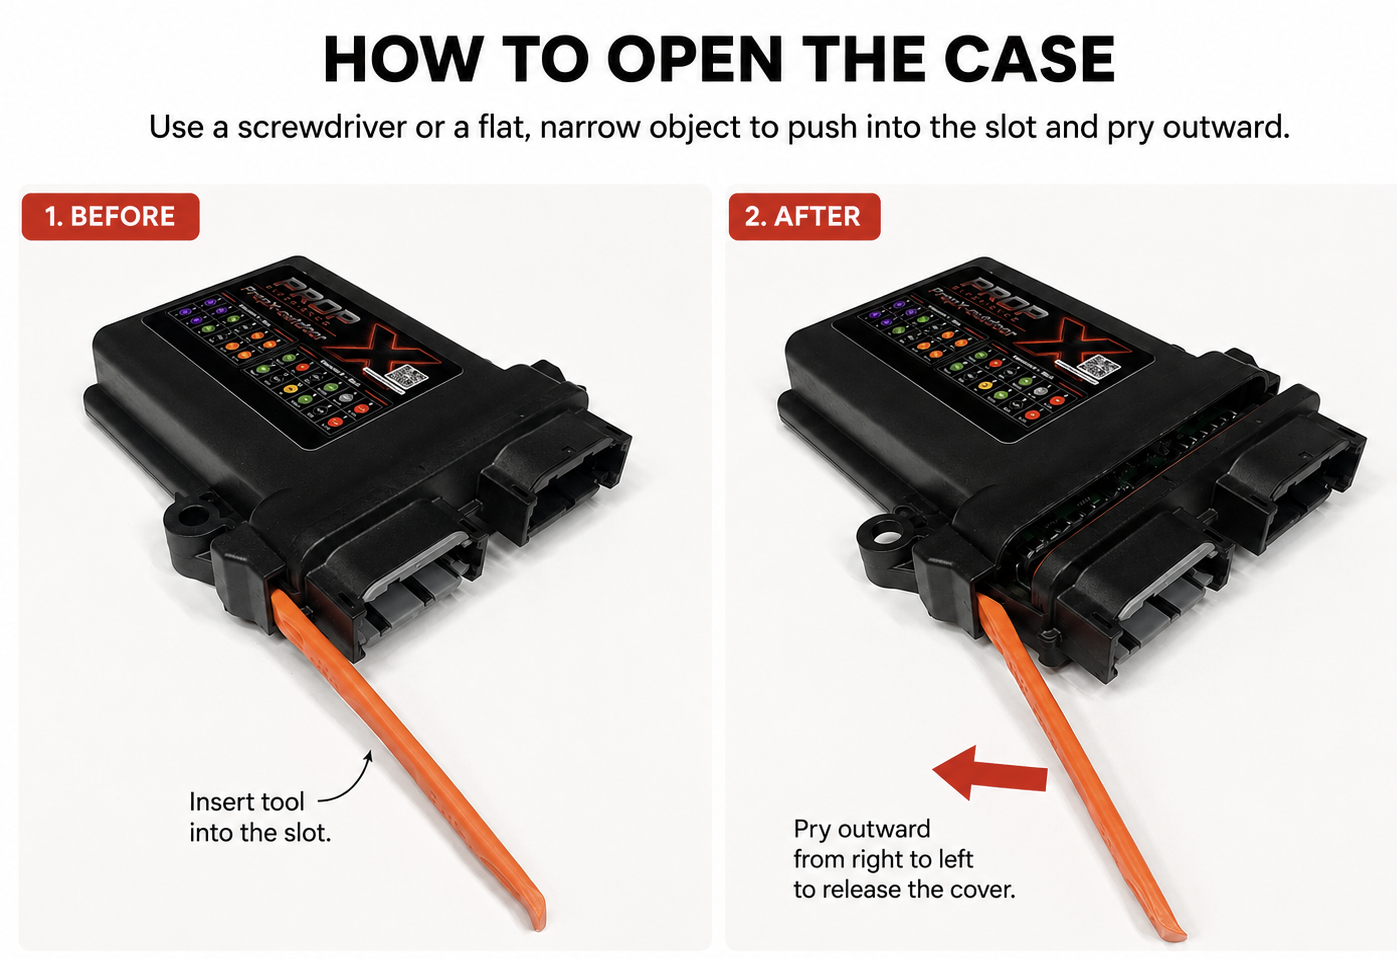
You'll see: the board exposed inside.
Connect a USB-C cable to the board's USB connector to power it up.
Insert a MicroSD card now too, if you want more storage than the 32 MB built in.
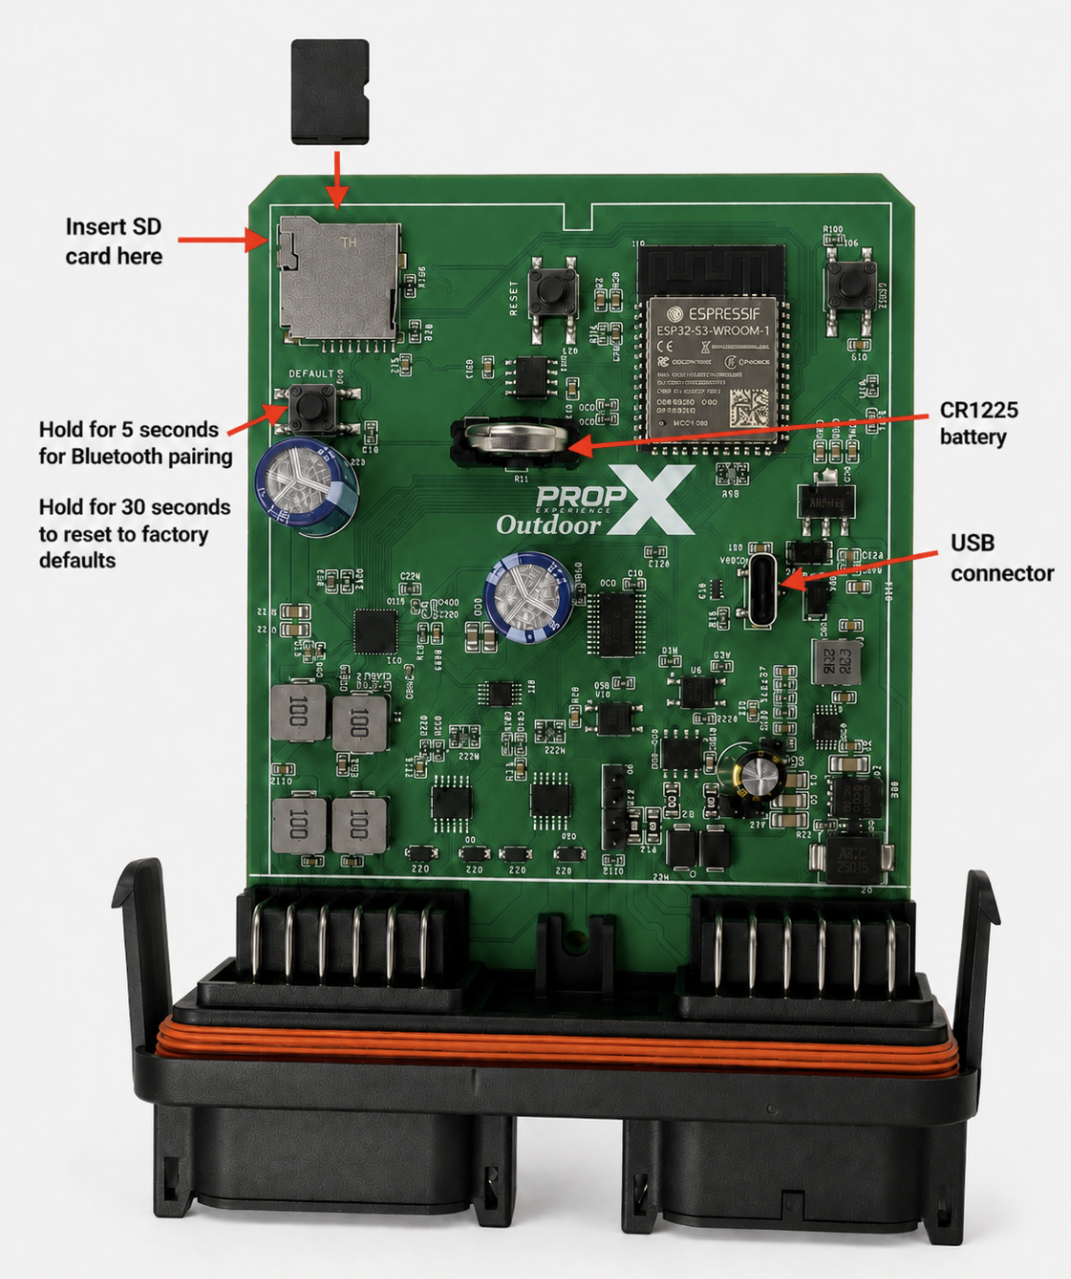
You'll see: nothing — the Outdoor has no status lights.
Wait at least 5 seconds, then hold the DEFAULT button for 5–10 seconds.
You'll see: nothing on the board — but it's now in pairing mode, advertising over Bluetooth.
In the app, click Scan.
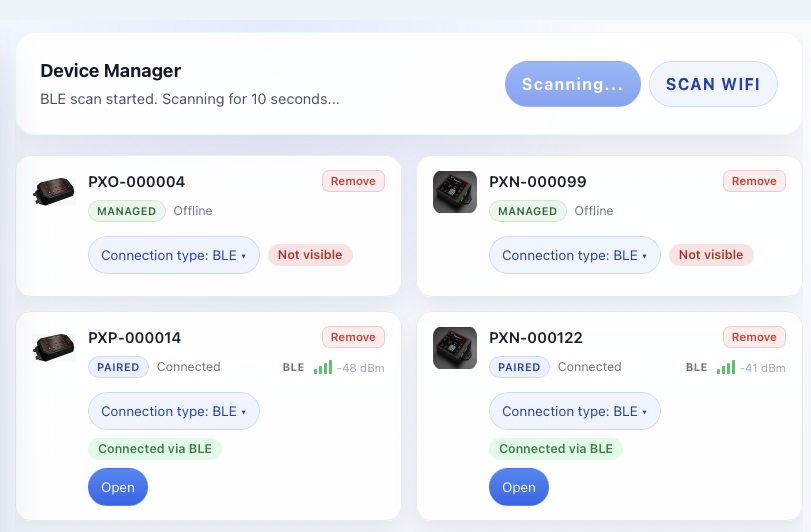
You'll see: your controller as PropX-Outdoor- plus your serial number.
Click Add next to your controller.
You'll see: it connects — no PIN needed.
Disconnect the USB-C cable, then close the case: fit the board back into the enclosure.
You'll see: the enclosure reassembled, ready for wiring.
Wire up Connector B (black) — power and trigger inputs.
Connector B (black) Pin Power (+) 6 and/or 7 Power ground (−) 8 Trigger 1 1 Trigger 2 12 Trigger power 2 Trigger ground 11 Wire up Connector A (grey) — audio and outputs.
Connector A (grey) Pin Audio R+ 5 Audio L− 6 Audio L+ 7 Audio R− 8 Output 1 11 Output 2 12 Output 3 2 Output 4 1 Output ground 3, 10
⚠️ Warning: Never connect or disconnect wires on Connector A or B while the power supply is plugged in.
Done. Test every output and trigger from the app, then close and latch the lid — the setup guide covers taking it outside.