
Plan: wire and test indoors first, then install outdoors and seal up. Fixing wiring at a bench beats fixing it on a ladder in the rain.
Before you start, you’ll need
- Your PropX-Outdoor and a 9–24 V DC supply (up to 5 A), kept out of the weather
- Props, weather-rated sensors and speaker, outdoor-suitable cable
- A small flat screwdriver or similar tool, to open the case and for mounting
- A USB-C cable
- A computer with Bluetooth and the PropX Control Center app
Open the case and pair
Push a screwdriver or a flat, narrow tool into the case's slot and pry outward to release the cover.
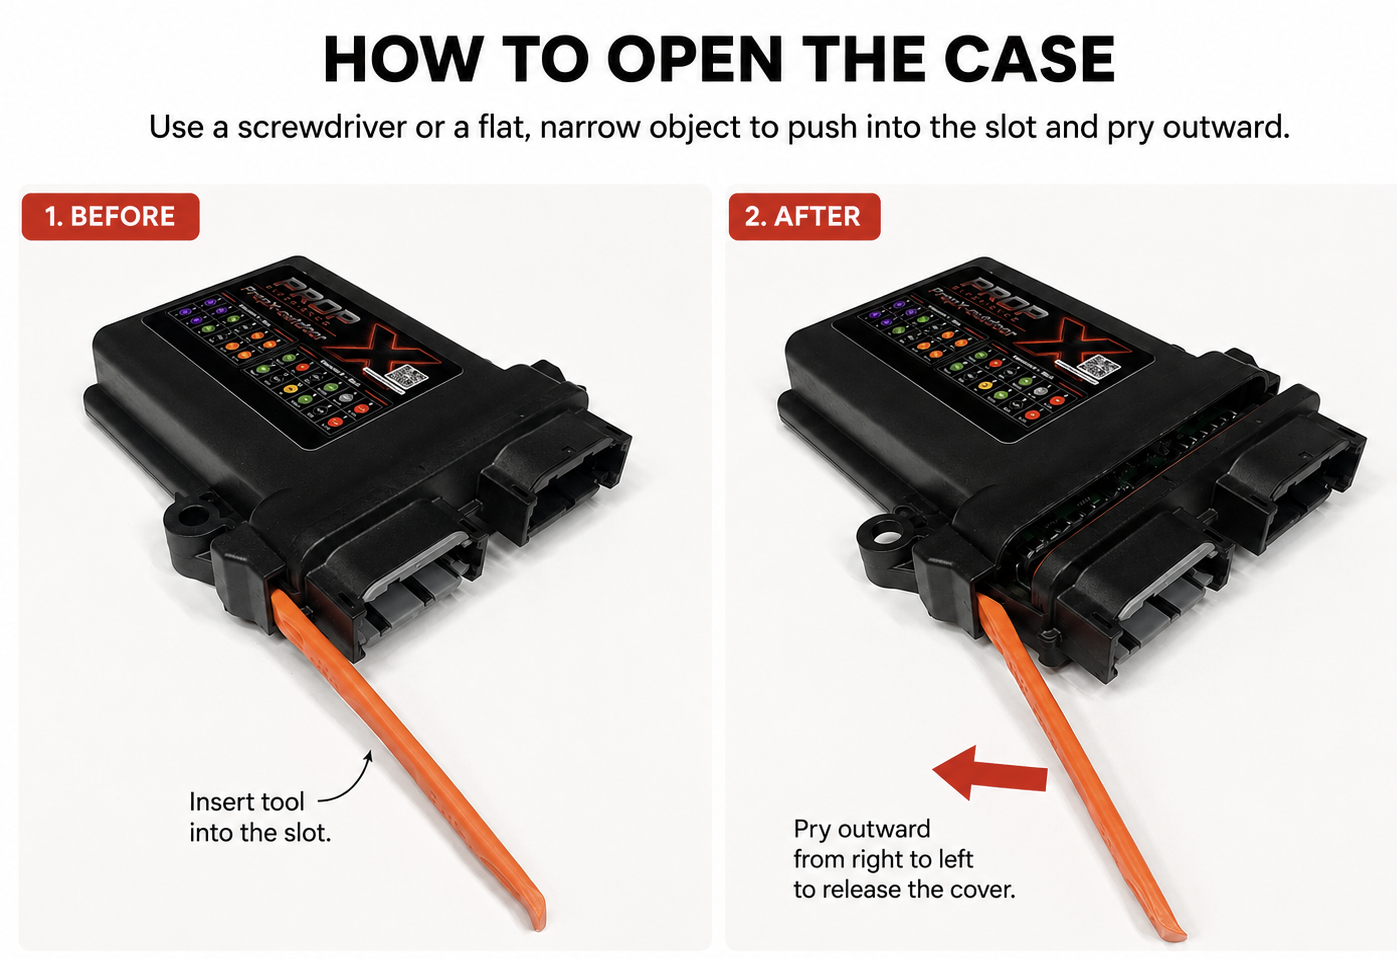
Connect a USB-C cable to the exposed board to power it up. Insert a MicroSD card now too, if you want more storage than the 32 MB built in. The Outdoor has no status lights — nothing changes visibly, but it's now powered.
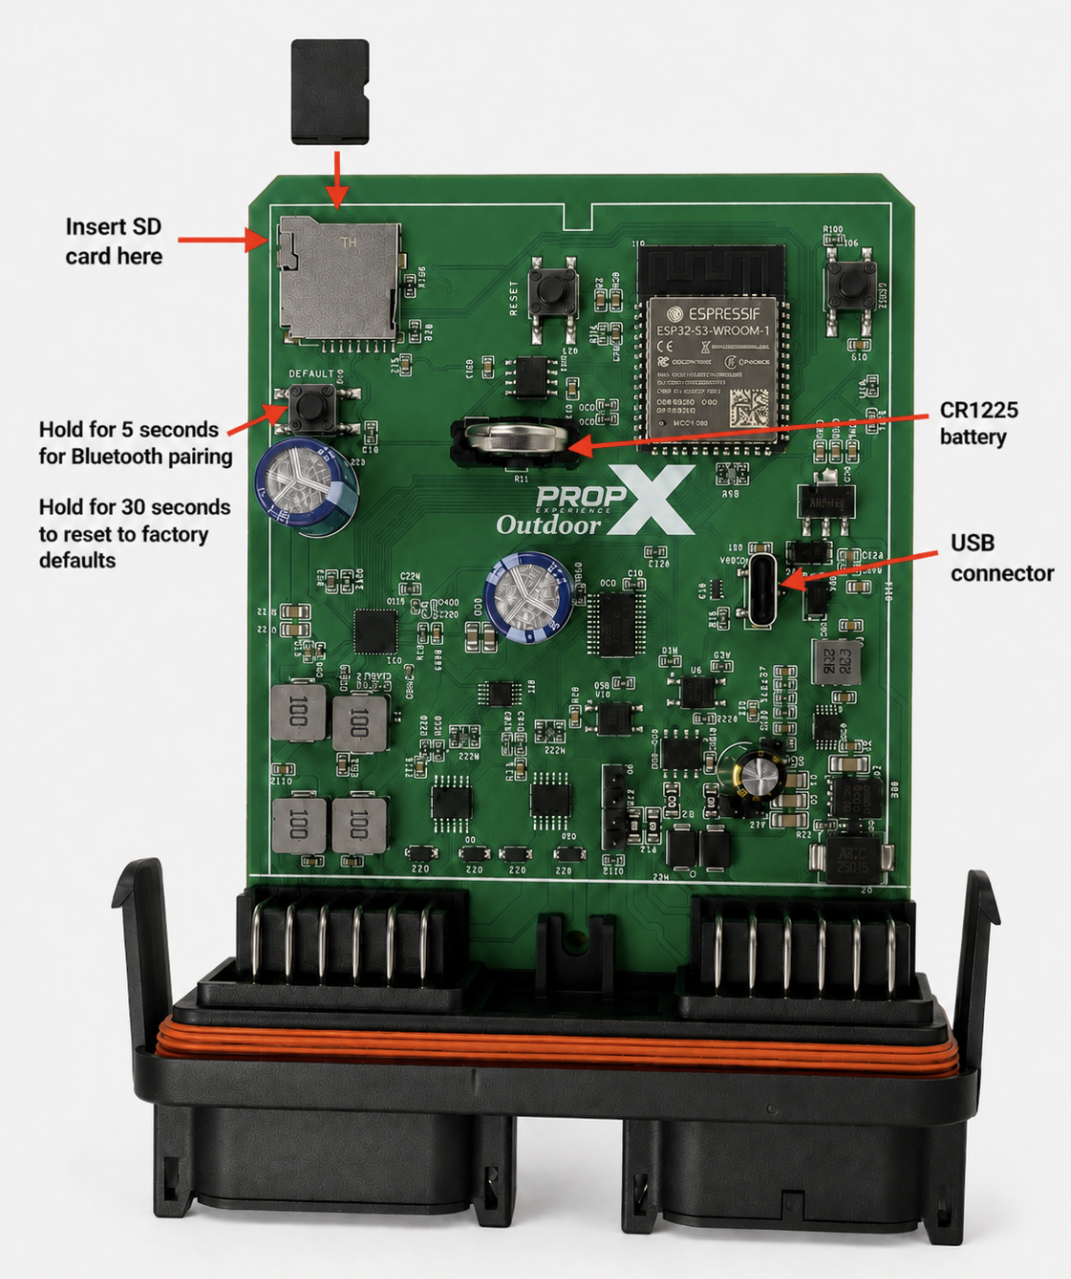
Wait at least 5 seconds, then hold the DEFAULT button for 5–10 seconds — that puts it in pairing mode (advertising over Bluetooth; again, no light change to look for). Then pair with the app: click Scan, find your controller as PropX-Outdoor- plus your serial number, and click Add — no PIN needed.
Disconnect the USB-C cable, then close the case: fit the board back into the enclosure.
Load your sounds (optional)
MP3s (≤32 MB each) from the app or a MicroSD card. The card slot is on the internal board, next to the DEFAULT button — insert it while the case is open, back in Section 1.
Wire everything, then test
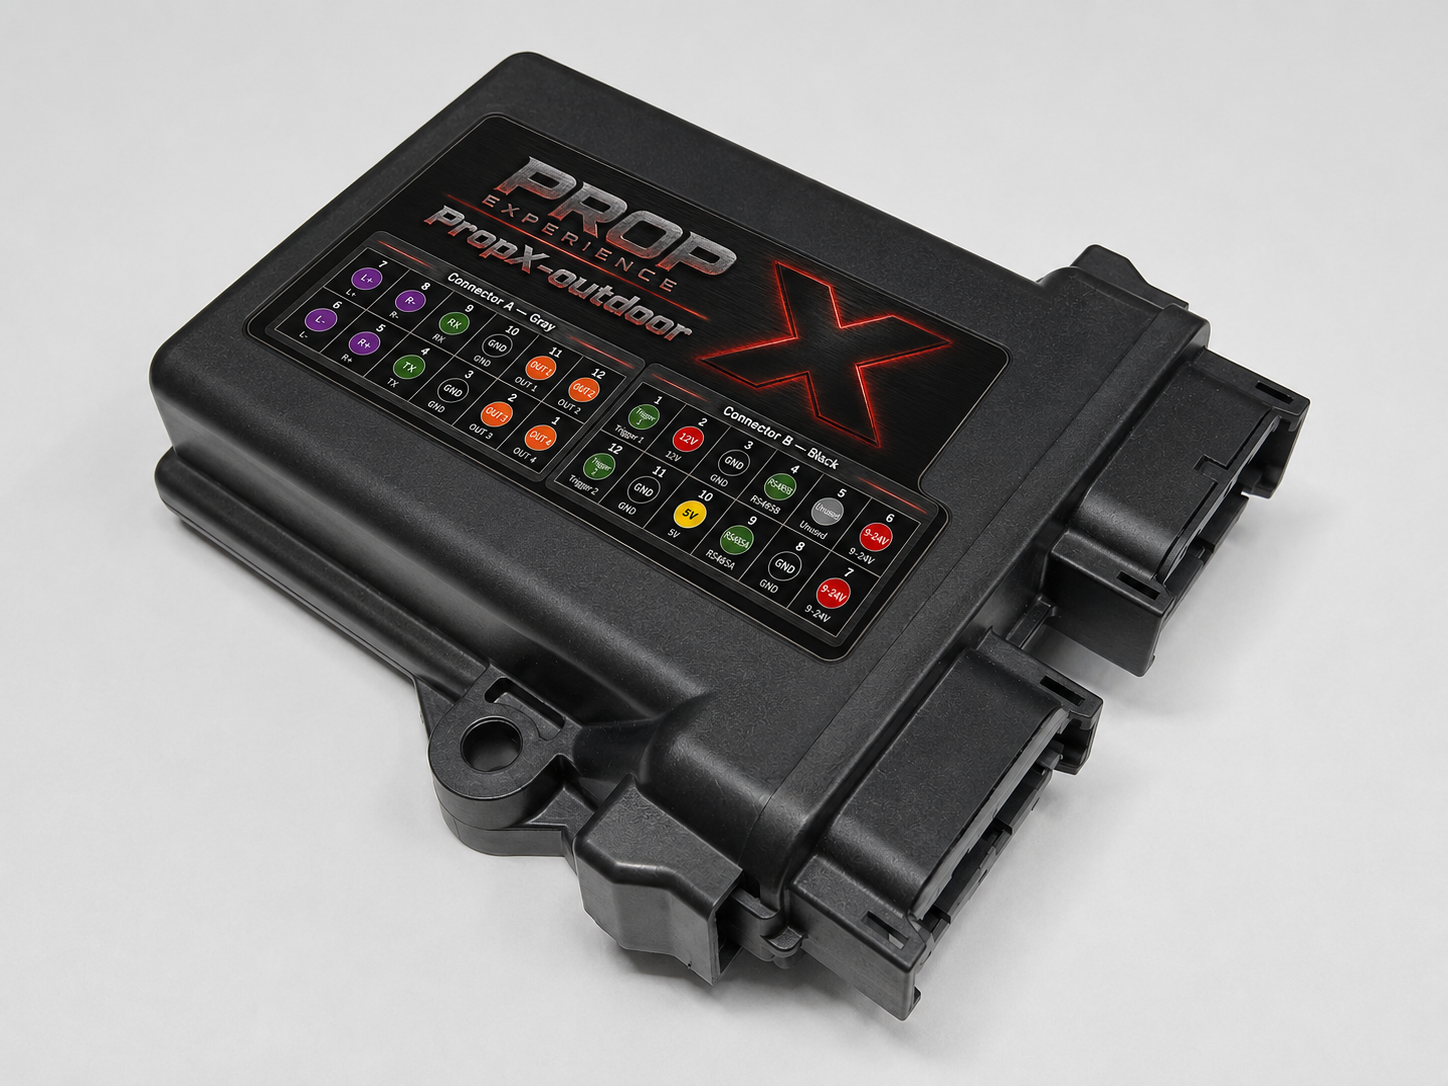
Route each cable through an entry and land it on the right pin:
| Connector B (black) | Pin |
|---|---|
| Power (+) | 6 and/or 7 |
| Power ground (−) | 8 |
| Trigger 1 | 1 |
| Trigger 2 | 12 |
| Trigger power | 2 |
| Trigger ground | 11 |
| Connector A (grey) | Pin |
|---|---|
| Audio R+ | 5 |
| Audio L− | 6 |
| Audio L+ | 7 |
| Audio R− | 8 |
| Output 1 | 11 |
| Output 2 | 12 |
| Output 3 | 2 |
| Output 4 | 1 |
| Output ground | 3, 10 |
(Real wiring photos for this section are coming — the pin tables above are current.)
Test every output, trigger, and the speaker from the app while it's all easy to reach.
Connect with Bluetooth
- Pair with the app — the Outdoor pairs the same way as every PropX controller, but getting it into pairing mode is different: open the case, connect USB-C, and hold DEFAULT for 5–10 seconds, as covered in Section 1. Then Scan and Add in the app.
Seal up
Re-check the gasket, close the lid, and latch it — press firmly, and you'll usually hear the retainers click into place. Check every cable entry is snug. This step is the weatherproofing.
Install outdoors
Mount through the enclosure holes
(117 × 133 mm), positioned so sprinklers, runoff, and fog machines don't hit a cable entry straight on. Point entries downward where possible.
Mounted outdoors, entries facing down IMG-OUT-FS-04 — photo coming soonKeep the power supply out of the weather
and run its cable to the controller.
Re-test everything from the app
once installed.
Seasonal care
Open the enclosure only indoors or under cover; check the gasket every time; if you ever find moisture inside, dry it fully before closing up.